Cloud Director service - Part 2 : Configuring custom DNS and Certificates
Length: 589 words | Estimated Reading Time: 3 minutes
Today I want to share a quick post on configuring a custom DNS and certificates for a Cloud Director instance. This is typically the step after the initial instance deployment and SDDC association. For this example I will demonstrate the process using the Cloud Director GUI and also via PowerShell with a certificate generated using CertBot because its free and it works.
It is important to note that the public DNS records (for the Console Proxy and API/UI) must be resolvable and fully propagated globally before you begin this step or the task will fail to execute due to a verification failure.
Step 1. Get the DNS address for the Instance
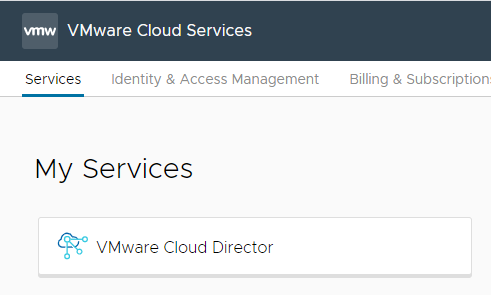
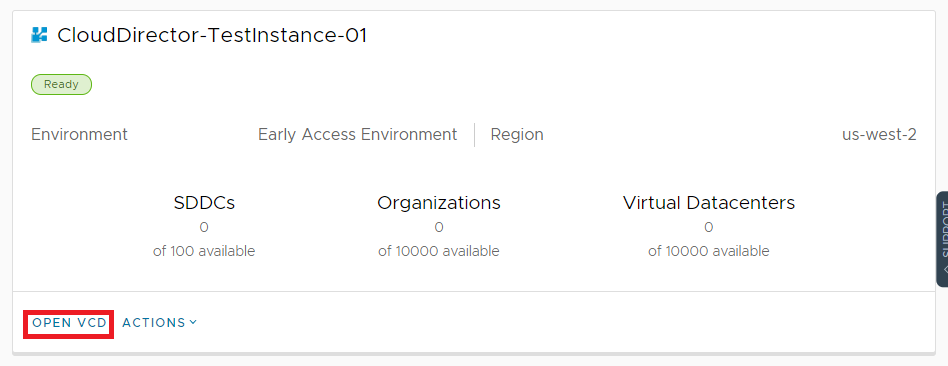
Logon to the VMware Cloud Services portal and from the Organization hosting your Cloud Director service, select the VMware Cloud Director tile and under the instance menu select the “Open VCD” button.
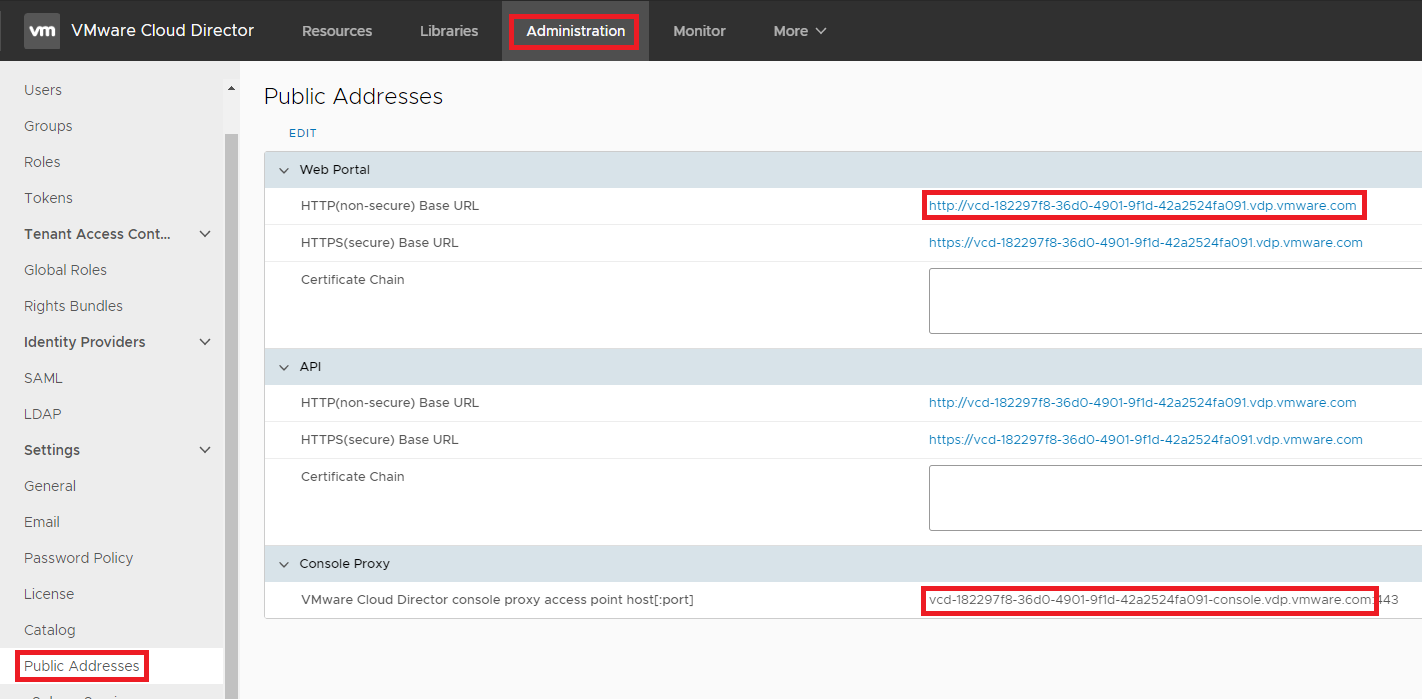
Logon to the instance using the System Administrator credentials and select Public Addresses from the Administration menu and record the API/Portal DNS records and the Console Proxy address.
Step 2. Create a CNAME record in your DNS
Logon to your public DNS servers/providers DNS portal and create a new CNAME record (eg. clouddirector.pigeonnuggets.com) pointing to the DNS record of the Web Portal/API and a second record for the Console Proxy (eg. clouddirector-console.pigeonnuggets.com)

Step 3. Prepare and format the TLS Certificates
For this example I will use a wildcard certificate generated using CertBot however in Production you should use your enterprise trusted certificate authority to generate a SAN certificate for the service. For a PoC the below process can be used:
- Install Certbot
- Execute “certbot certonly –manual”
- Specify the domain “*.domain.tld” and when prompted create a TXT record _acme-challenge in the DNS zone
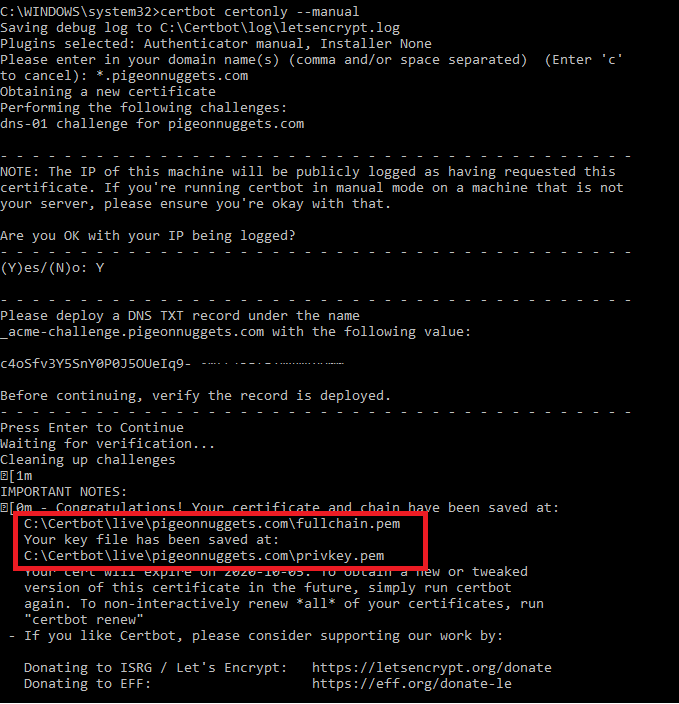
Prepare certificate file (including Root CA, Intermediates and the Certificate) and the Private Key in PEM format (Base64 encoded DER certificate).
Step 4. Install the Certificate and set Custom DNS
Logon to the VMware Cloud Services portal and from the Organization hosting your Cloud Director service, select the VMware Cloud Director tile and under the instance menu select the “Actions > Associate Custom Domain” and when prompted provide the custom DNS records created in Step 2 and the Certificates created in Step 3.
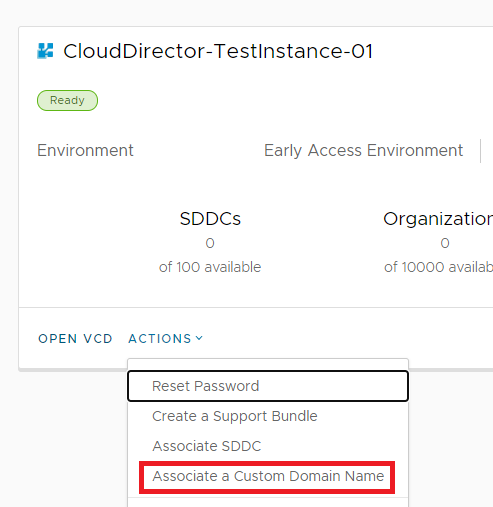
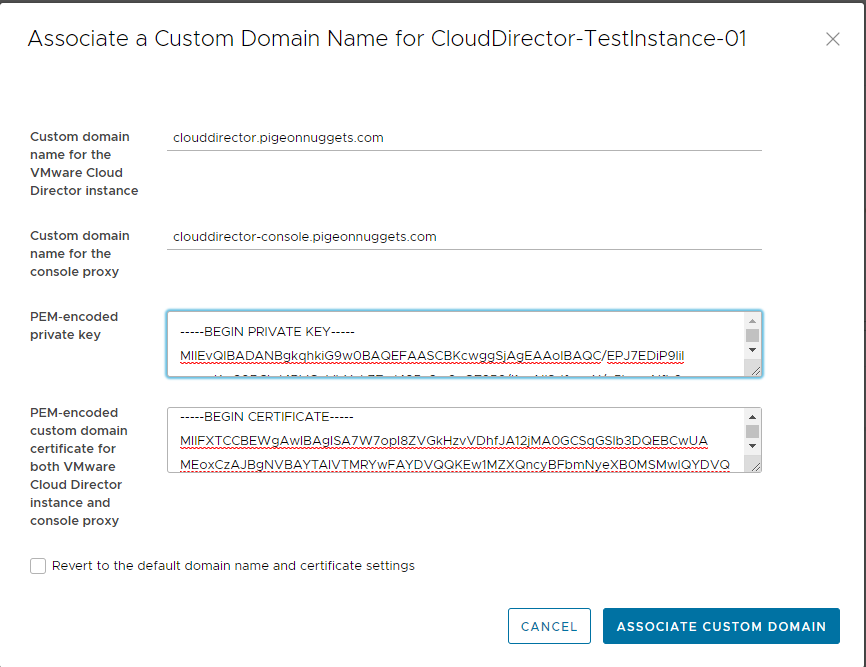
Step 4. (Alternative) Install the Certificate and set Custom DNS (But using PowerShell)
You can also perform the Associate Custom Domain using the VMware.CDS.Community PowerShell module.
Install-Module -Name VMware.CDS.Community -Scope CurrentUser
Import-Module VMware.CDS.Community
Connect-VCDService -CSPAPIToken "Your token goes here"

[Hashtable] $CloudDirectorEnvironment = @{
    InstanceName = "CloudDirector-TestInstance-01"
    InstanceFQDN = "clouddirector.pigeonnuggets.com"
    ConsoleProxyFQDN = "clouddirector-console.pigeonnuggets.com"
    CertificatePEM = (Get-Content [[Fully Qualified Path to Full Certificate Chain]].pem -Raw)
    CertificateKeyPEM = (Get-Content [[Fully Qualified Path to Certificate Key]].pem -Raw)
}

Set-VCDSDomain @CloudDirectorEnvironment
Disconnect-VCDService
Step 5. Test it worked
Now navigate to your custom domain and check that everything works, you should see your certificate being presented and the DNS resolving to your Cloud Director instance.
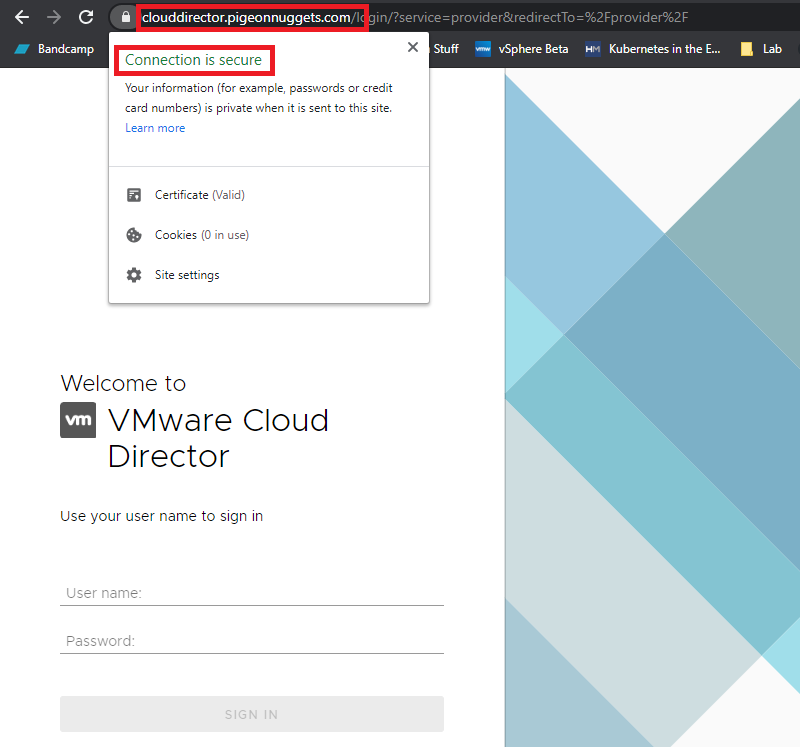
Next it’s time to customize and configure everything else. Any questions or feedback please reach out to me on Twitter (@AdrianBegg) or on the VCPP/vExpert or VMWare Code Public Slack.